Showing posts with label recipe. Show all posts

Wednesday, January 7, 2015

Snow Ice Cream on a Snow Day

Yes, we had a snow day today! Well, rather, it was a cold day. The snow hit on Monday, we had school on Tuesday, and then today was cancelled for the -35 windchill. Brrrr!

So, what to do on a snow day. Have you heard of snow ice cream? A friend shared a link on Facebook for fun activities to do on snow days, and it included a link to 
the Sugar Pie Farmhouse Blog on making snow ice cream. It's literally ice cream made from snow! 


It calls for 8 cups of snow, 1 can of sweetened condensed milk, and 1 teaspoon of vanilla.


After making this recipe (if that's what you'd call it!), I can tell you the snow measurement is pretty subjective! I think it has to do with how hard you pack your measurements and what kind of snow you have. We needed a lot more than 8 cups! We could tell as we stirred because it was very liquid-like until we added extra snow.


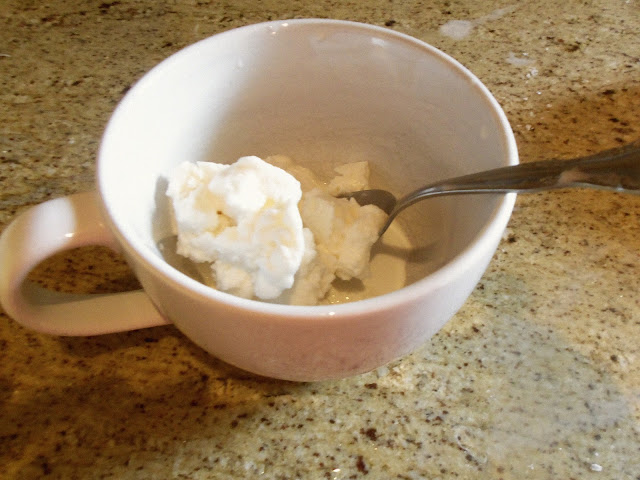
We split ours into two bowls so each of our kids could mix. I gave them each 1 teaspoon of vanilla in their half batches, and I think that was a good choice. Also, I figured out why the original post didn't include very many "before" pictures. It doesn't look very appetizing at first, does it?


Sure enough, after some stirring and adding in more snow, we had ice cream! It came together so quickly that I didn't even get pictures of the kids stirring it up.

It didn't hold its ice-cream consistency for all that long. This is really something you'd want to eat right away. But how cool and fun! It's very easy to do with little ones.


...and a blurry shot of my snow ice cream (I tossed in a few chocolate chips. Shhh).


Wednesday, December 24, 2014

Candy Cane Cookies

On a Facebook group I follow, a local woman shared her grandma's recipe for candy cane cookies. I decided to give a go at making them to give as Christmas gifts for the neighbors. They were fun to make, looked super cute, and tasted buttery and delicious. I couldn't get the peppermint candy pieces to stick, but I think the cookies looked better and tasted better without them anyway. The only other change I'd recommend is using less almond extract, as I thought it was a touch overpowering (my husband, on the other hand, liked the almond flavor).

The directions that are italicized are my additions.

Ingredients:

2 1/2 cups flour
1 teaspoon salt
1/2 cup shortening
1/2 cup softened butter
1 cup powdered sugar
1 egg
1 1/2 teaspoons almond extract (I think 1/2 tsp would be enough)
1 teaspoon vanilla
1 1/2 teaspoons red food coloring (or as needed)
1/2 cup coarse sugar 
1/2 cup crushed peppermint candies (optional)

Directions:
1. Stir together the flour and salt. Set aside.
2. In a separate bowl, mix shortening, butter, powdered sugar, egg, and flavorings.
3. Stir half of flour mixture into shortening mixture. Work in remaining flour mixture with your hands until dough holds together.
4. Divide dough in half. Blend red coloring in half of dough.
5. Divide each half into four balls and refrigerate for 30 minutes while the oven preheats to 375.
6. Make two strips of two colors, side by side. Make like a rope.

My picture of my cookie dough rope:


7. Cut into pieces approximately 6 inches long.  Curve tops like love handles (Those are the grandmother's words, not mine!).

Here's my picture of the cut sections:


8. Bake nine minutes at 375 degrees.
9. While warm, remove from sheet and sprinkle with mixture of crushed candy and sugar (I preferred just the sugar without the crushed peppermint candies).
 10. Enjoy! Also, you will gain weight (Again, her grandmother's words and not mine! Ha!).

Once cool, I packaged them up in some plastic wrap, tied them with a ribbon, and attached a gift tag. All together, this made ~20 cookies for me, but some were very fragile and broke. Thankfully, I had some helpers who were willing to eat those broken ones ;-)


Sunday, October 5, 2014

Oliver's Cooking Show: Pumpkin Muffins

Oliver and Jo have been watching all of the old episodes of Oliver's Cooking Show, and Oliver asked me if we could do another episode. I can't believe it's been a year since his last one! So, I agreed, and I asked him if he'd like to make muffins for his show. My friend had told me about a 3-ingredient pumpkin muffin recipe a couple years ago, and we've made it a few times since then. It's easy and works perfectly!

Here's Oliver doing his latest cooking demonstration:


Wednesday, June 25, 2014

Raspberry-Covered Chocolate Chips

The raspberries keep coming! Now, there are a few, ripe, red raspberries starting on one of our other raspberry bushes.

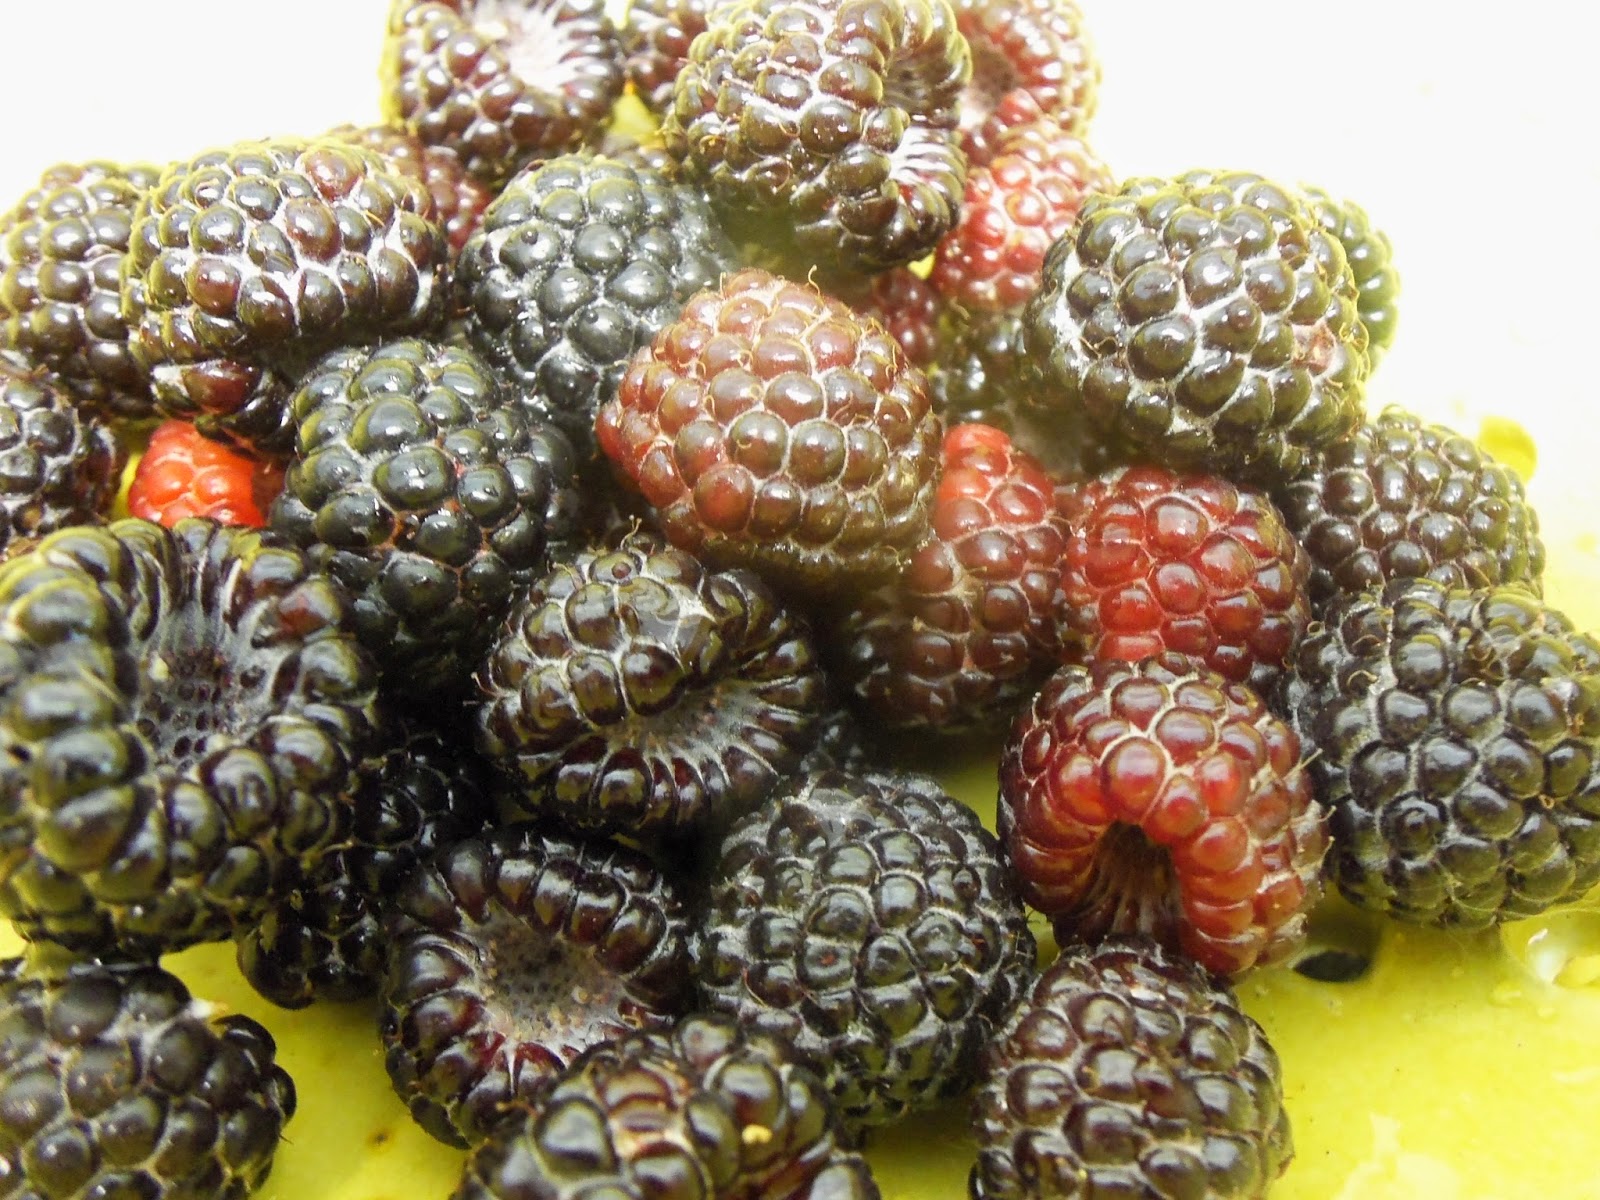
It's a good thing previous owners planted all of these raspberry plants because I never would have put them in myself. I don't really like raspberries, but I've discovered that black raspberries are pretty good! 

Here was our bounty yesterday afternoon. Mind you, this is after picking all of the ripe ones the evening before. I keep picking them, and the kids gobble them up!


I had a bit of a craving for some chocolate after lunch, so I decided to make a quick dessert snack with the kids. My mother-in-law showed us this, and it's the perfect "recipe" for kids to help with. All you do is take a chocolate chip (we used dark chocolate) and stick it in the opening of the berry. It's super easy & quick, sweet & delicious.


Thursday, September 12, 2013

Challah for Rosh Hashanah!

We're not Jewish, but I couldn't help but ogle all of the beautiful foods people were posting online last weekend for Rosh Hashanah. I decided to try to make our own challah! I love baking, and I have the best baking assistant ever--my 3 year old! Unfortunately, we haven't done well with bread. I don't know if it is us or our altitude (5,280 ft), but my breads always come out either too dense or too cake-like.

On Allrecipes.com, I found a recipe for high altitude challah. It came out beautifully. The recipe recommended braiding the bread with 3 or 4 strands, but we ended up braiding it with 5. I looked up a video on YouTube to braid our challah. Yum! We ate it with a little butter a couple hours after we took it out of the oven, and, the next day, we used it to make toast for breakfast.


Friday, June 7, 2013

Kid Friendly: Ice Cream in a Bag!

You can make ice cream with your kids by having them shake it in a bag! I must have seen this idea on Pinterest: kids can "churn" ice cream by shaking it in a bag full of ice. I looked online for a recipe and found a simple one on Disney's website. In a Ziploc bag, you add:

*1 cup of half & half
*2 tablespoons of sugar
*1 teaspoon of vanilla.

We made this recipe a few days ago, and that bag leaked a little. So, this time, we put that bag into a second one. Then, take one of those gallon-sized Ziploc bags and fill it about halfway full with ice, and add approximately half a cup of rock salt. Place the smaller bag with the ice cream mixture into the bag with the ice. Then, let your kid go crazy shaking it for about five minutes. Voila! Ice cream!

It's supposed to make a single serving, but we found we got two small servings out of it (perfect for our little kiddos). We did two of these each time. Each time, one came out pretty well, and the other didn't. So, this recipe is kind of hit-or-miss, but it's a lot of fun regardless!

This is our attempt on Tuesday night. One of the bags didn't churn well, but the other did fine.


Oliver actually lost his ice cream on Tuesday night for pushing his sister, so we tried again on Thursday night. The process was a lot better the second time, especially since I had Andrew to help me. Here they are loading the large bags with ice and rock salt:


Here are the kiddos shaking their ice cream bags. It took about 5-10 minutes of shaking to churn some ice cream. Oliver was so excited this time around, and he declared that he wasn't going to push Jo!


Just like Tuesday night, our attempt last night had one winner and one failure. The one that worked turned out perfectly!


I think the kids enjoyed it!


Well, it looks like we're making some progress on our summer bucket list. This past weekend, we went to the splash park at Centennial Center Park, and, today, we made ice cream!

Our updated summer bucket list:

* Watch a fireworks display on the Fourth of July.
* Bake a berry stars & stripes cake with Oliver.
* Run through the sprinklers.
* Go to a splash park.
* Play in the "creek" at the Children's Mordecai Gardens at the Denver Botanic Gardens.
* Watch our first parade.
* Ride the outdoor train at Belleview Park.
* Visit a petting zoo.
* Take the kids for a swim.
* Have a real outdoor picnic on the grass with a picnic basket.
* Watch a sunrise.
* Go for a hike in the mountains.
* Go on a road trip.
* Go out for an ice cream cone, and eat it outside!
* Make our own ice cream, and let Oliver choose the flavor.
* Pick and eat vegetables out of the garden we're growing at Grandma Judy's house.
* Eat cherry tomatoes right off the vine at Aunt Bonnie & Uncle George's house.
* Throw water balloons.
* Go tent camping overnight.
* Look at stars in the sky.
* Visit Andrew at work for lunch.
* Take the train downtown to visit Grandpa Larry for lunch.
* Go to the Fireman's Museum.
* Use sidewalk chalk.
* Blow bubbles.
* Take Father's Day photos with the letters that spell out "DAD" again.

Monday, April 29, 2013

Meatless Monday: Homemade Vegetable Broth

I few months ago, I decided to try to make my own vegetable broth. I looked up a few how-tos online. It seemed simple enough, and it was! I can honestly say homemade broth is a lot tastier than the boxed stuff. While broth isn't very expensive, it still saves money to make your own, and you can feel good about using your scraps. I've made my own broth about half a dozen times this winter. Here's what you do:

First, keep a large piece of tupperware in your freezer. I have a one-gallon size. Whenever you chop or peel vegetables, throw your scraps into it. You can add onion peels, celery leaves, whatever! I've even added some freezer-burned peas and canned corn leftover from corn bread. If any of my vegetables start to get a little old in the fidge, I'll just roughly chop them and add them to my collection in the freezer. I've even added some canned tomato paste (I always have some leftover when recipes call for 1 Tbsp of tomato paste or whatever). Here is a picture of one of mine before making it into broth:

Once my tupperware is full (this might take a month), I put everything into a large pot and fill it with water, like so:

I bring it to a full boil, and then I reduce the heat and let it simmer for about 3-4 hours. At that time, I add some salt and garlic powder for extra flavor.

When that's done, I pour the liquid into a bowl through a strainer. All those vegetable pieces get discarded, but at least they got one more use before hitting the landfill (they'd also be great for composting, if you either do your own composting or live in a city where they collect compost for you).

Here's my broth! If I'm going to use it within the next couple days, I just pop it in the fridge. If I'm not sure when I'm going to use it, I put it in the freezer until I need it.

All of the dishes I make with broth (like penne primavera) taste so much better with the homemade stuff. Plus (maybe it's just me), I get satisfaction out of making things myself. This takes very little effort, but it does take some time.

Monday, April 15, 2013

Oliver's Cooking Show: Chocolate Strawberry Pops

Oliver's back with his fourth cooking episode! We recorded the footage for this episode last month but didn't get to the editing until this past weekend.

In this episode, Oliver is going to show you how to dip strawberries into melted chocolate. Check out my passionate chef on "Oliver's Cooking Show" here:


You can find his previous shows at the links below:

Episode 1: Peanut Butter

Episode 2: Chocolate Brownies

Episode 3: Fruit Smoothies

Tuesday, February 26, 2013

Oliver's Cooking Show: Fruit Smoothies


In this third episode of his cooking show, 3-year-old Oliver will teach you how to make a fruit smoothie.

You can find his other cooking show episodes here:

Episode 1: Peanut Butter
Episode 2: Brownies

Friday, December 14, 2012

The Easiest Pumpkin Spice Muffins


Last year, for Oliver's birthday party, I found a very easy pumpkin cake recipe on allrecipes.com. The ingredients are literally just this: a box of spice cake mix and a can of pumpkin. Based on some of the reviews, I added an egg to make sure it rose properly.

Well, last month, the topic of this cake came up in a Pinterest group I joined. Apparently, some people use those two ingredients and bake it into a spice cake. Others use muffins. One girl said to add cinnamon chips to the muffins. My grocery store just started carrying cinnamon chips, so I made a mental note to try the recipe out sometime. I bought all the stuff and left it in the cabinet for a rainy day.

I'm currently avoiding caffeine--no coffee (even decaf), no tea, and no chocolate. It's a long story, and I hope the situation is just temporary. I'm the queen of coffee, and this is no easy feat. It's also hard avoiding all the chocolate treats set out this time of year. So, I decided to make a treat I can eat--these easy pumpkin spice muffins.

Oh, my. These aren't just good. They are phenomenal. We made two dozen. I've already eaten three today, and it's 10am. Joanna has had two, and Oliver has had one. I need to hide them or something to make sure they last until Andrew gets home.

This is what I used:

1 box of spice cake mix
1 can of pumpkin
1 egg
1 package of cinnamon chips 


Here's what I did:

1. Beat the spice cake mix with the pumpkin and egg. Stir in the cinnamon chips.

2. Pour into muffin cups (I got 24). Bake at 325 for about 20 minutes, or until done.

Could it be any easier? Could they be any more delicious? The answer: No.

Well, I bet you could try cutting out the egg, if you'd like.


Enjoy!

Monday, November 26, 2012

Oliver's Cooking Show: Peanut Butter

Oliver loves cooking shows, so my husband decided to make him his very own! Learn how to make peanut butter from a toddler here:

Thursday, September 20, 2012

Acorn Squash


Most of us think of pumpkins when we think of autumn. I do, too, but I also look forward to baking acorn squash for dessert. It's so simple and yummy. Andrew's family taught me how to do this years ago.

Pick up an acorn squash from your grocery store. One squash will provide dessert for two people. This time of year, they probably run about $1 to $2. 


 Slice your squash in half, like so:

Scoop out the seeds (discard them) and lightly scour the inside of the squash with a knife.

Take a 9x13 cake pan and fill it with about half an inch to an inch of water. Place your acorn squash, cut side down, in the pan. Bake in a 350-375 degree oven for half an hour.

After 30 minutes, pull your pan out of the oven. Carefully remove the squash, and discard the water (careful, it's very hot). Put the squash halves back in the empty pan, this time cut side up. Take a dab of butter and drop it in the well of your squash. Add in a couple spoonfuls of brown sugar and a sprinkle of cinnamon (another yummy variation is to add some apricot jam instead of brown sugar and cinnamon).

Bake your squash for another 30 minutes. This is what it will look like coming out of the oven:

To eat, just take your fork and mash up the insides, blending the squash with the butter and sugar. The skin acts as a bowl.

Autumn is making its official start this weekend, so it will be the perfect time to try out this recipe. Enjoy!

Monday, September 10, 2012

Meatless Monday: Vegetable Sushi Rolls


Sushi is so cheap to make at home. It's surprisingly easy as well.

I know some people think of sushi and associate it with raw fish. It's true that a lot of sushi is made with raw fish--but not all. My best friend has worked at a lot of sushi restaurants, and when I go visit her, I order cucumber rolls. They're just sushi rolls stuffed with rice and cucumber, and they're sometimes sprinkled with sesame seeds. At a restaurant, they cost about $4 for a roll (6 pieces), but at home, they cost about 50 cents for the same amount.

Andrew and I started to make our own at home because it's a fun meal that's crazy inexpensive. We have date nights at home once or twice a week. On those nights, we make dinner just for the kids, and once they're in bed, we make a special dinner for ourselves.

Before Andrew even gets home from work, we make rice. We are so lucky to have a great rice maker that we got as a wedding gift from my in-laws. I don't normally advocate for spending extra money for having the best of anything (like, who really cares if your ice cream scoop or duster is top of the line or not?), but this rice maker has made a world of difference for us. We have rice with a lot of our meals because all we have to do is mix rice with water and push a button. That's it. It's so easy that we just have Oliver make the rice. Seriously. It has settings for brown rice, white rice, sushi rice, etc. You just tell it whether or not you've washed the rice first, and it changes the cooking accordingly. Love it.


Here's Oliver setting the rice cooker. It plays "Twinkle, Twinkle," when it starts and finishes, which Oliver sings along to. Oh, and it has a "keep warm" setting and an "extended keep warm setting," which lets us make our rice hours in advance.    
                                      

Alright, rice is cooking!  Now let me go through a list of everything you need. Our regular grocery store sells both seaweed and wasabi (optional) in the Asian section. While it's still fairly inexpensive there, you can certainly get it for much cheaper at an Asian grocery store.


Ingredients:
One package of roasted seaweed
Here's what we use. It costs less than $2 and lasts for 2-3 dinners, depending how hungry we are:


2 cups sushi rice (regular white rice will be fine; it just won't be as sticky)
Vegetables sliced long and thin
We used my favorite, sliced cucumber, as well as sliced avocado, slices of fried tofu, and some cooked eggs:
Soy sauce for dipping
Optional: sesame seeds, wasabi, and fresh ginger

Making Sushi

Here comes the fun part!

Saturday, August 25, 2012

Fruit Pizza


Fruit pizzas are my husband's trademark dessert. He makes them a few times a year, and Oliver loves to help. This was my first time making one.

They are so easy to make, but, best of all, they're a great dessert to make if you have a little helper in your household like we do. You could even make mini-fruit pizzas for a children's party to let each kid decorate his/her own!

Here's what you need:
Crust:
1 tube of sugar cookie dough (I used Pillsbury)
Sauce:
(Note: You can just use a can of your favorite frosting.  I won't tell anybody.)
8 ounces of cream cheese or neufatel cheese
4 ounces (1/2 stick) of softened butter
2 cups of powdered sugar (confectioners sugar)
Toppings:
Various fruit - We used two kiwis, a can of drained mandarin oranges, blueberries, blackberries, and strawberries
Glaze:
The zest and juice from one orange
1 cups of powdered sugar (confectioner's sugar)

To make:
1. Spread your cookie dough out on a pizza pan.  I had to use my knuckles to gently push the dough from the center to the edges.  Prick the dough all over with a fork.  Bake according to package directions.

2. Beat cream cheese, butter, and the 2 cups of powdered sugar together to make frosting "sauce."  Alternatively, pop the top off of your can of frosting.

3. While your cookie crust is baking and cooling, prep your fruit. Wash what needs washing and chop what needs chopping. If you're using any fruit that is prone to browning (apples, pears, bananas, etc), toss them in a bit of lemon or lime juice to slow their oxidation.

4. After your cookie pizza crust cools completely, spread the frosting all over the crust, leaving about an inch of space along the circumference of your pizza.

5. Decorate with fruit!  This is the fun part.  You can look up images of fruit pizzas online to get really fancy, or just help your kids put the toppings on.  You really can't go wrong.

6. Whisk the juice and zest of an orange with a cup of powdered sugar until smooth. This is your glaze. Drizzle it liberally all over your pizza.

7. Slice your pizza and dive in!


Sunday, July 29, 2012

Nan's Frozen Lemonade Pie


Andrew's grandmother, "Nan," would have been 86 this week. Grandma Colleen came over to watch Oliver for a bit and told him they were going to make a pie that Nan always made: frozen lemonade pie. Oliver pretends to make pie all the time with whatever he has on hand: magnetic letters, dirt, you name it. He was thrilled. They mixed a can of sweetened, condensed milk with half a can of frozen lemonade concentrate and a 12 ounce tub of Cool Whip and poured the mixture into a graham crust. Colleen popped it in the freezer for a couple of hours, and then we enjoyed a delicious, tart pie. This simple recipe is a good one to try with your toddler helper at home!

Friday, April 20, 2012

Soft Brown Sugar Cookies

I stumbled upon a unique cookie recipe online that looked mouthwatering.  I pinned it to my Pinterest boards to make sure I wouldn't lose it.  Here's my pin:  http://pinterest.com/pin/216383957066504346/

The only ingredient that required a trip to the store for me was the sour cream.  The next day, I picked some up from the store and jumped into cookie baking.  Andrew came home in the midst of it and remarked that our house smelled like pancakes.  He was right.  These cookies smell just like pancakes as they bake!

I glazed them with the butter glaze when they came out.  Andrew swore they tasted just like pancakes, too.  I thought, if I ever make these again, I should add maple to the glaze to add to the effect.  They're already dubbed "the pancake cookies" in my house.

I loved how soft these cookies are.  They tasted sweet, but in a good way.  Still, I think when I crave a soft, fluffy cookie, I'll go to my old standby and make these lemon ricotta cookies:
http://pinterest.com/pin/216383957066527621/

Friday, March 30, 2012

Buckeyes

Andrew's putting in a few extra hours over the next few work days as his company sets up a new office in the Springs. As a thank you to him for all his hard work, I made him one of his favorite treats: buckeyes.

It was my first time using that recipe, and these are the best buckeyes I've ever made. The recipe is a keeper! I sent him an email with this photo, telling him some peanut buttery goodness awaits him for when he gets home tonight:

Wednesday, March 28, 2012

Whole Grain Cinnamon Swirl Muffins

I love attempting healthier versions of baked goods. Some work out, and some don't. Thankfully, this Pinterest pin that my friend posted did work out:
http://pinterest.com/pin/216383957066404065/

I substituted apple sauce for the mashed banana, and I also substituted oat flour for the whole wheat flour because that's what I had on hand. They made the whole house smell cinnamony good, and they had a great cinnamon flavor as well. The whole grain flour made them a little dense, but it was easy to ignore that for the amazing flavor and aroma. Best of all, my toddler gobbled them up. I had to give him half a muffin at a time because he kept asking for more.


Monday, March 26, 2012

Banana Nutella Fudge Pops

I have to share this success pin from Pinterest:
http://pinterest.com/pin/216383957066403492/

Admittedly, I don't really like bananas, and these banana-based fudge pops were too "banana-y" for me. They were a big hit with my husband and toddler, though, and their texture was perfect--fudgey, gooey, and melty.
I halved the recipe and got four pops. Oliver seems to have lost two of the sticks for my popsicle molds, so I made two of them in silicone cupcake molds and used a wooden popsicle stick in them.

We ate them after they were in the freezer for only three hours, so it's possible they're not as gooey if left overnight. I'm not sure, but they were the perfect, healthy treat on a warm spring evening.


I plan on making these for my husband and kids all summer long!

Friday, March 9, 2012

Apple Chips

I'm a sucker for making things, and I also like to eat. I really try to make mostly healthy things, although it doesn't always work out that way. For example, all week long, my husband has been leaving me hints to bake him a cheesecake (he loves when I make this one), so I finally bought the ingredients yesterday.

Because I'll be indulging in cheesecake this weekend, I've been avoiding all junk food this week. It's not easy. Thankfully, a friend came along and pinned these apple chips:
http://pinterest.com/pin/216383957066324478/

My mother-in-law had given me an apple peeler/corer/slicer because she knows I like to make apple butter in the fall. I actually hadn't used it yet because I thought it would be a big hassle to figure out how to use it and clean it. Yesterday, I decided to dig it out because I had no idea how to go about coring an apple without slicing it lengthwise.

It was a breeze! I stuck my apples onto the end of the pokey, and I let Oliver crank it. It cored and sliced the apples for me (I chose to keep the peel on). OK, so I messed up one apple while trying to figure it out, but then we cored and sliced five apples in less than 5 minutes.

Here's the aftermath:

Clean-up actually wasn't too difficult because I opted to spray it down full-force with my kitchen sprayer, and then I set it out to dry.

I didn't have any parchment paper on hand, so I baked the apple slices directly on the cookie sheets. Some stuck a little, but it wasn't bad. I sprinkled cinnamon on the slices and baked them at 275 for 45 minutes. I flipped them, sprinkled a bit more cinnamon, and rotated the cookie sheets in the oven because the back ones were cooking faster than the front ones. After another 45 minutes, I had to pull them out because some were burning. Most still weren't done and were very chewy. Only a small handful had any crispiness to them. In spite of the texture thing, they were so good. I couldn't eat just one and ended up eating like half of them. Plus, they made the whole house smell great. Here's how they looked:


I'm definitely (definitely) making these again, but I'm going to work at the recipe to try to get them more dehydrated. I think they would have turned out even better in a 200 or 225 degree oven, even if that means they would need to cook a lot longer.

Apple chips. You should make these. I hope you have fun playing with this recipe!