Showing posts with label kid food. Show all posts

Friday, June 7, 2013

Kid Friendly: Ice Cream in a Bag!

You can make ice cream with your kids by having them shake it in a bag! I must have seen this idea on Pinterest: kids can "churn" ice cream by shaking it in a bag full of ice. I looked online for a recipe and found a simple one on Disney's website. In a Ziploc bag, you add:

*1 cup of half & half
*2 tablespoons of sugar
*1 teaspoon of vanilla.

We made this recipe a few days ago, and that bag leaked a little. So, this time, we put that bag into a second one. Then, take one of those gallon-sized Ziploc bags and fill it about halfway full with ice, and add approximately half a cup of rock salt. Place the smaller bag with the ice cream mixture into the bag with the ice. Then, let your kid go crazy shaking it for about five minutes. Voila! Ice cream!

It's supposed to make a single serving, but we found we got two small servings out of it (perfect for our little kiddos). We did two of these each time. Each time, one came out pretty well, and the other didn't. So, this recipe is kind of hit-or-miss, but it's a lot of fun regardless!

This is our attempt on Tuesday night. One of the bags didn't churn well, but the other did fine.


Oliver actually lost his ice cream on Tuesday night for pushing his sister, so we tried again on Thursday night. The process was a lot better the second time, especially since I had Andrew to help me. Here they are loading the large bags with ice and rock salt:


Here are the kiddos shaking their ice cream bags. It took about 5-10 minutes of shaking to churn some ice cream. Oliver was so excited this time around, and he declared that he wasn't going to push Jo!


Just like Tuesday night, our attempt last night had one winner and one failure. The one that worked turned out perfectly!


I think the kids enjoyed it!


Well, it looks like we're making some progress on our summer bucket list. This past weekend, we went to the splash park at Centennial Center Park, and, today, we made ice cream!

Our updated summer bucket list:

* Watch a fireworks display on the Fourth of July.
* Bake a berry stars & stripes cake with Oliver.
* Run through the sprinklers.
* Go to a splash park.
* Play in the "creek" at the Children's Mordecai Gardens at the Denver Botanic Gardens.
* Watch our first parade.
* Ride the outdoor train at Belleview Park.
* Visit a petting zoo.
* Take the kids for a swim.
* Have a real outdoor picnic on the grass with a picnic basket.
* Watch a sunrise.
* Go for a hike in the mountains.
* Go on a road trip.
* Go out for an ice cream cone, and eat it outside!
* Make our own ice cream, and let Oliver choose the flavor.
* Pick and eat vegetables out of the garden we're growing at Grandma Judy's house.
* Eat cherry tomatoes right off the vine at Aunt Bonnie & Uncle George's house.
* Throw water balloons.
* Go tent camping overnight.
* Look at stars in the sky.
* Visit Andrew at work for lunch.
* Take the train downtown to visit Grandpa Larry for lunch.
* Go to the Fireman's Museum.
* Use sidewalk chalk.
* Blow bubbles.
* Take Father's Day photos with the letters that spell out "DAD" again.

Tuesday, April 2, 2013

National Peanut Butter & Jelly Day

It's national Peanut Butter & Jelly Day! Is there anything more American than a peanut butter & jelly sandwich? I don't think so. In fact, I'm pretty sure this American staple is considered weird in some other parts of the world. On Wikipedia, I read the average American will have eaten 2,500 peanut butter & jelly sandwiches before graduating high school! That's over 130 sandwiches per year for 18 years. Yup, we like them that much.

My kids are no different! They love their peanut butter and jelly sandwiches, and they have a PBJ for lunch about 3 times a week. Here's Jo pictured with her diced sandwich after nap time.


Oliver is a big fan of PBJ Day.


Want to make your own peanut butter? Oliver can show you how!
http://becky-shattuck.blogspot.com/2012/11/olivers-cooking-show-peanut-butter.html

Since I'm posting pictures from this afternoon anyway, I am thrilled to show off Joanna's very first pigtails.

Monday, February 11, 2013

Dinner for my little Valentine


I decided to get creative with Oliver's dinner tonight. I was making grilled cheese and soup when I remembered something I once saw on the internet (maybe Pinterest. OK, probably Pinterest). They suggested cutting sandwiches with heart-shaped cookie cutters. I decided to do it to Oliver's grilled cheese. I chopped up the remaining grilled cheese parts into bite-sized pieces for Jo's dinner. You could probably just used them as little soup croutons for yourself if you don't have a little one.

I put the hearts on one of the owl plates that my mom gave the kids last year for Valentine's Day (I believe they were from Target). I drained his chicken noddle soup and then used the noodles to make a nest for the owls. Voila!


Wouldn't this make a cute toddler lunch on Valentine's Day?

Wednesday, November 28, 2012

Easy Toddler Lunches

For a long time, I wouldn't make Oliver a lot of "kid" foods. I didn't want him having artificial colors and getting a taste for high-sodium junk foods. Oliver was so picky. He wouldn't eat anything! I don't think he gained a pound from about 16 months old (when he was weaned) until close to his second birthday. People say kids grow a taste for what they're given, but that was not true with Oliver. Our nutritionist at WIC would talk to me about how Oliver wasn't keeping up his weight on the weight-height chart. I kept food available to him literally all day long to try to get him to eat more, but it didn't work.

I had to learn to be less picky as his mom and started to let him eat lots of more typical kid foods, like chicken nuggets. Oliver eats a little of what Andrew and I eat, but he's happiest with simple foods like Cheerios, fish sticks, quesadillas, and peanut butter and jelly sandwiches. So, we let him have those foods for lunch. I don't serve separate dinners, though. I expect him to eat the same dinner as Andrew and me. It doesn't really work, and we have to fight to get him to eat each bite.

Anyway, Oliver doesn't eat fruit and vegetables straight up. He'd literally rather not eat. Our WIC nutritionist told me to always have fruit and vegetables on his plate so he gets used to seeing them so that maybe he'll start eating them one day. I do that, but I also hide fruits and vegetables into his meals to get him to eat them.


Here are three lunch ideas that help me get extra fruit and veggies into my kids' meals. Enjoy!

1. Use baby food in quesadillas

This tip was given to me by a friend a couple years back, when I was struggling to get Oliver to eat his vegetables. For the life of me, I can't remember which friend it was to give credit to (Lisa??).

If your kid is especially picky, use a fairly mild flavor of baby food, and one that will blend into the color of the cheese, like squash. My kids don't notice the baby food and will eat their quesadillas no matter what baby food I smear in there. I used Gerber Garden Vegetables.

All you do is smear a bit of baby food onto your tortilla:


Sprinkle cheese over the baby food:

Tuesday, September 11, 2012

Peanut Butter and Jelly Sushi

Yesterday, I promised I'd share a kid-friendly sushi recipe with you today. I didn't forget!

Check out what I stumbled upon on Allrecipes.com!

It's so easy!  OK, so mine didn't turn out as nice-looking as Smucker's did, but Oliver didn't seem to mind.

First, use a rolling pin and flatten out a piece of bread.  If you don't do a good job here, the bread won't roll very well and will crack.

Then, spread some peanut butter onto the flattened slice of bread.  Spread some jelly or jam on top of the peanut butter. Your rolls will look cuter if you use a dark jelly. I made these last time with apricot jam, and they weren't as cute because there was no contrast. Cut off the crusts, and then roll up your bread (starting with a long side). Your roll should look something like this:

Slice your roll into six pieces and set them on a plate.  Look how cute!

We have some toddler monkey chopsticks that my in-laws gave us for Oliver. He loves them. He used them for two pieces of sushi before setting them aside and just using his hands.


The cutest part? When he was all done, he asked me for "more peanut butter jelly sushi."

Saturday, August 25, 2012

Fruit Pizza


Fruit pizzas are my husband's trademark dessert. He makes them a few times a year, and Oliver loves to help. This was my first time making one.

They are so easy to make, but, best of all, they're a great dessert to make if you have a little helper in your household like we do. You could even make mini-fruit pizzas for a children's party to let each kid decorate his/her own!

Here's what you need:
Crust:
1 tube of sugar cookie dough (I used Pillsbury)
Sauce:
(Note: You can just use a can of your favorite frosting.  I won't tell anybody.)
8 ounces of cream cheese or neufatel cheese
4 ounces (1/2 stick) of softened butter
2 cups of powdered sugar (confectioners sugar)
Toppings:
Various fruit - We used two kiwis, a can of drained mandarin oranges, blueberries, blackberries, and strawberries
Glaze:
The zest and juice from one orange
1 cups of powdered sugar (confectioner's sugar)

To make:
1. Spread your cookie dough out on a pizza pan.  I had to use my knuckles to gently push the dough from the center to the edges.  Prick the dough all over with a fork.  Bake according to package directions.

2. Beat cream cheese, butter, and the 2 cups of powdered sugar together to make frosting "sauce."  Alternatively, pop the top off of your can of frosting.

3. While your cookie crust is baking and cooling, prep your fruit. Wash what needs washing and chop what needs chopping. If you're using any fruit that is prone to browning (apples, pears, bananas, etc), toss them in a bit of lemon or lime juice to slow their oxidation.

4. After your cookie pizza crust cools completely, spread the frosting all over the crust, leaving about an inch of space along the circumference of your pizza.

5. Decorate with fruit!  This is the fun part.  You can look up images of fruit pizzas online to get really fancy, or just help your kids put the toppings on.  You really can't go wrong.

6. Whisk the juice and zest of an orange with a cup of powdered sugar until smooth. This is your glaze. Drizzle it liberally all over your pizza.

7. Slice your pizza and dive in!


Wednesday, July 4, 2012

Red, White, and Blue Popsicles


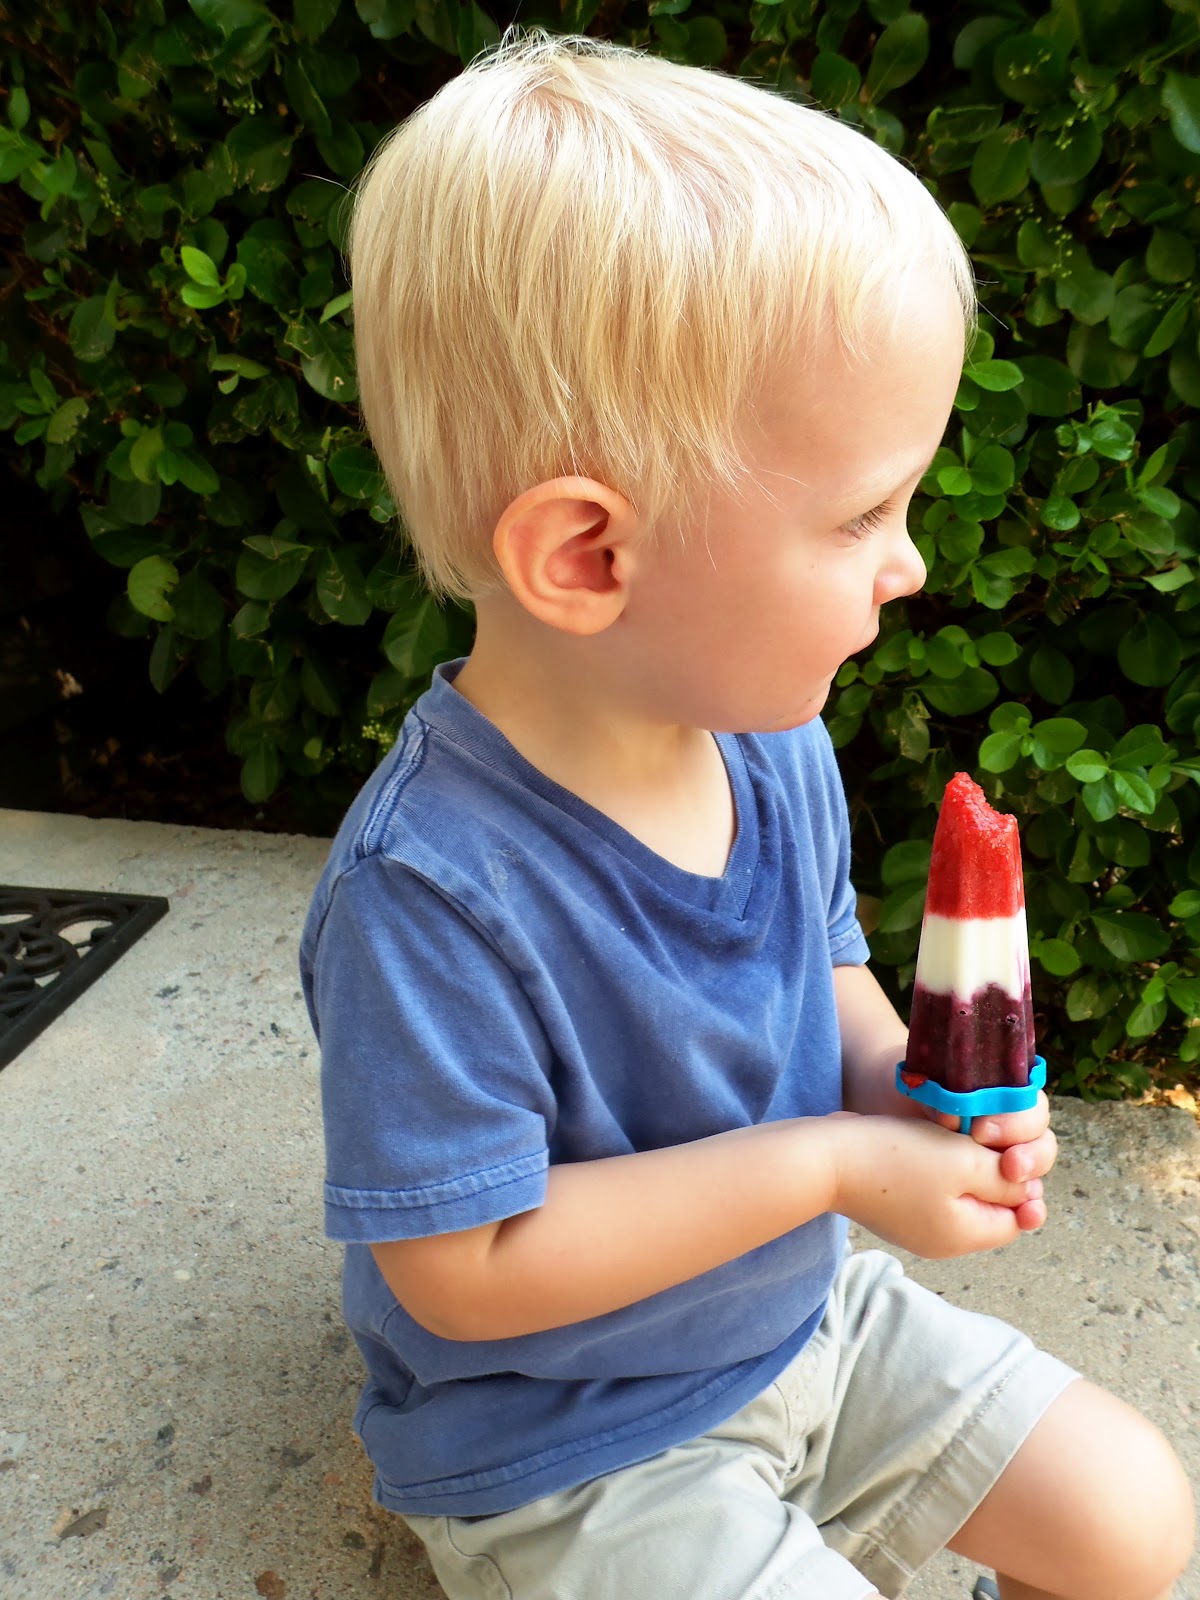
For the Fourth, I made homemade popsicles for the kiddos.  I layered pureed blueberries, Greek yogurt (that I sweetened), and pureed strawberries to create red, white, and blue layers.  I had to freeze the pops for about 10 minutes between layers to make sure they wouldn't run together.  It worked well, and both kids gobbled them up!

Monday, March 26, 2012

Banana Nutella Fudge Pops

I have to share this success pin from Pinterest:
http://pinterest.com/pin/216383957066403492/

Admittedly, I don't really like bananas, and these banana-based fudge pops were too "banana-y" for me. They were a big hit with my husband and toddler, though, and their texture was perfect--fudgey, gooey, and melty.
I halved the recipe and got four pops. Oliver seems to have lost two of the sticks for my popsicle molds, so I made two of them in silicone cupcake molds and used a wooden popsicle stick in them.

We ate them after they were in the freezer for only three hours, so it's possible they're not as gooey if left overnight. I'm not sure, but they were the perfect, healthy treat on a warm spring evening.


I plan on making these for my husband and kids all summer long!

Wednesday, February 22, 2012

Pinterest Challenge Day 22: Monkey Pancakes

My son loves monkeys. He has half a dozen stuffed monkey animals at our house, and he can't sleep without one of them. In fact, he woke up at 3am this morning. I was downstairs (already awake for the day), and, from over the monitor, I heard, "Monkey? Monkey?" I had to go unearth "Monkey" from his monkey blankets and give it back to him so he could go back to sleep.

So, when I saw a pin for monkey pancakes, I had to repin it to save for later.
http://pinterest.com/pin/216383957066132869/

That later day came today! As soon as Oliver was up for the day, we set to work. Oliver held Monkey in one arm while stirring with the other. He kept exclaiming excitedly, "Monkey pancakes!" even though he couldn't possibly know what monkey pancakes were.

We finished making the pancakes, and I built a monkey. I used a warm chocolate chip to draw in the mouth. I set a banana on the plate and proudly presented it to Oliver.

He loved them! He'd announce all of the facial parts before biting into them. Don't worry: he took care to make sure "Monkey" got some, too.


Thursday, February 2, 2012

Pinterest Challenge Day 2: Groundhog's Day Dessert

Happy Groundhog's Day! Puxatawney Phil spotted his shadow this morning, which means we're in for six more weeks of winter. The forecast seems to support that, as we're expecting eight inches of snow tomorrow.

In honor of this little holiday, I decided to do this pin for day two of the Pinterest Challenge:
http://pinterest.com/pin/216383957066066367/

Yesterday, Oliver really wanted to use the food processor, so I decided to get a jump on today's pin. We dumped a bunch of Oreos into the food processor and chopped them up. Then, we got busy making pudding (I used Jello-brand chocolate pudding). If you like instant pudding or pudding cups, you can use those, too. I don't like the aftertaste of either of those, so we made pudding on the stove. I let Oliver mix until it started to get hot, and then I took over. I spooned them into three separate bowls, sealed them with plastic wrap, and stuck them in the fridge to wait for today.

Then came the fun part: making the groundhogs. Oliver and I melted chocolate chips in the microwave, and, using toothpicks, we drew two eyes and a nose on each of three Nilla Wafer cookies. Actually, I say three, but that's a lie. Twice, Oliver swiped a face cookie and ate it. That's OK; it gave me more practice. Once I had three, uneated cookies with faces on them, I used the melted chocolate to attach sliced almonds to the top of the "head" to act as the ears. Tada! Instant groundhogs.

Just in case you're thinking my son is a child prodigy, I want to clarify that, no, he did not make actual faces. He enjoyed drawing chocolate lines and dots on the cookies. These groundhog faces were my doing:

I sealed the groundhog Nilla Wafers in plastic wrap. I stuck the chopped up Oreos in a plastic baggie. The pudding was chilling in the fridge. Everything was ready and waiting for today, which made today the easiest "pin day" ever. After dinner, all I had to do was sprinkle Oreo crumbs on the bowls of pudding to look like dirt and stick a groundhog cookie in it to peek up out of the delicious earth.

Here's our final product:

Verdict? Delicious! But, of course, we knew it would be. I'm glad I'm blogging about this pin because it will remind me to do it for years to come. Who knows? Maybe next year, Oliver will be making actual faces on the groundhogs!

Wednesday, February 1, 2012

Pinterest Challenge Day 1: Healthy Cookie Dough Dip

My friend, Sam, challenged her friends to complete one of their Pinterest pins for every day they have off of work in February. I'm a stay-at-home mom, so I decided to take her challenge a step farther. I'm going to complete one of my pins every single day in February.

Assuming you've never been on Pinterest, let me quick tell you what it's about. People can pin anything they're interested in. It's almost like "liking" something on Facebook, except your whole profile is made up of your pins. People pin recipes, crafts, DIY projects for the home, gardening, and other how-tos. If you're like the average pinner, you'll end up pinning faster than you can complete the tasks! That's where Sam's challenge came in.

Today, I completed this pin: http://pinterest.com/pin/216383957066129767/. It's actually a healthy recipe that is designed to mimic eating chocolate chip cookie dough, straight from the bowl! All that's in it are beans, peanut butter, dates, oats, and chocolate chips, plus some vanilla, salt, and baking soda. To get the full recipe, just click directly on the picture from the link.

To be honest, I actually tried this recipe once before, but I did the version that uses brown sugar instead of dates. I liked it, and it was very filling, but the taste of chickpeas was extremely song. Also, I like soy milk and almost never drink regular cow's milk, but I thought the taste of soy was a little off in the cookie dough. I used that past attempt to try to improve on this one.

I decided to use white kidney beans instead of chickpeas. So much better! Chickpeas have a pretty strong flavor, and the white kidney beans are much more mild. I also subbed a few splashes of cow's milk for the soy milk, which took away more of the over-powering nutty flavor. Success!

Here's what mine looked like:


I preferred my version of her no-sugar added cookie dough over the one with sugar. It's so delicious! It tastes (and feels) almost exactly like cookie dough!

My husband came downstairs before work and caught Oliver and me each eating a small bowl full. I told him we'd made cookie dough dip. He looked at Oliver and asked, "But should he be eating it for breakfast?"
I got to proudly tell my husband that it was actually healthy, and the only questionable breakfast item in it was chocolate chips. I handed him the ingredient list as proof. He then took a taste and was quite impressed. So, in spite of the healthy, odd mix of ingredients, we all enjoyed it. I'm going to keep this one pinned to my board to be able to come back to again and again.

Friday, December 23, 2011

Gingerbread Cookies


Would the holidays be complete without some gingerbread cookie decorating with the kids? I don't think so!

Oliver loves baking and using the mixer, but I could not fathom making dough, letting it refrigerate, rolling it out, and decorating a million cookies with a two year-old. So, I took the kids out to the grocery store for refrigerated dough. I had the choice between a giant package of Pillsbury or a smaller package of all-natural cookies by Immaculate Baking Company. They were the same price, but I didn't want to be overloaded with cookies anyway. I went with the natural cookie dough. As a bonus, it came with a packet of decorating sugar, which we sprinkled on the icing later.

I worried the cookies wouldn't work because they were pre-formed into drop cookies for easy baking. I just took the lot of them and mashed them together into a ball for rolling. It wasn't a problem at all! Here's my helper rolling out the dough. Take note that my other helper is snoozing in the chair behind him:


Then came the fun part: the cookie cutters! We picked these up from Hobby Lobby yesterday. Their Christmas stuff was on sale for 50% off, so we bought a package of two gingerbread men cutters for $2.

Oliver thought the cookie cutter part was OK. He does it a lot with Play-Doh, so it's kind of lost its luster. As I punched out most of the cookies, Oliver stole little tastes.

The cookies swelled a lot during baking, and their shapes were pretty unrecognizable. I've had that happen with rolled cookies before, but it might have happened with the refrigerated dough because they were made to be drop cookies. No matter! I went back over them with the cookie cutters. It worked like a charm!

Once the cookies were cool, Oliver and I got busy decorating. I took the shortcut again and bought pre-made icing in a decorating bag. It was a little pricey at $3, but, sometimes, it's worth it to pay for conveniences. This was one of those times!

Oliver paused to sample a cookie:

The bag was difficult for him to squeeze, so I squirted a small amount into a bowl for him to use to decorate.

Decorating with one hand and eating a cookie with another:

Back to the squeeze bag:

Oliver decided to sample the icing, too. No wonder this kid wouldn't nap again today! I'm pretty sure 80% of his diet today was sugar.

Our finished cookies:

I have to take a moment to rave about these cookies. Their flavor was out of this world. I could taste the molasses. They really, truly tasted homemade. I don't think we would have made a better finished product if we went through the effort of making them ourselves. I decided they were good enough for gifts! We made tags for four of them to give to each of Oliver's grandparents. I let Oliver color the tags. He's pretty good at that stuff.

The final product:

Parents of toddlers, if you have loads of patience and deal well with messes, I highly recommend taking a few hours for some cookie makin' and bakin'. We had loads of fun!