Showing posts with label crafts. Show all posts

Friday, October 3, 2014

Spooky Thomas Party - Picture Cut-Out

I'm starting to get working on ideas for Oliver & Jo's birthday party this year. I love doing a Halloween-theme each year, but I know that the kids will eventually have their own ideas. This year, Oliver requested a Thomas the Train birthday party. I thought about it and asked him if we could do a spooky Thomas party. He agreed! I'm excited!

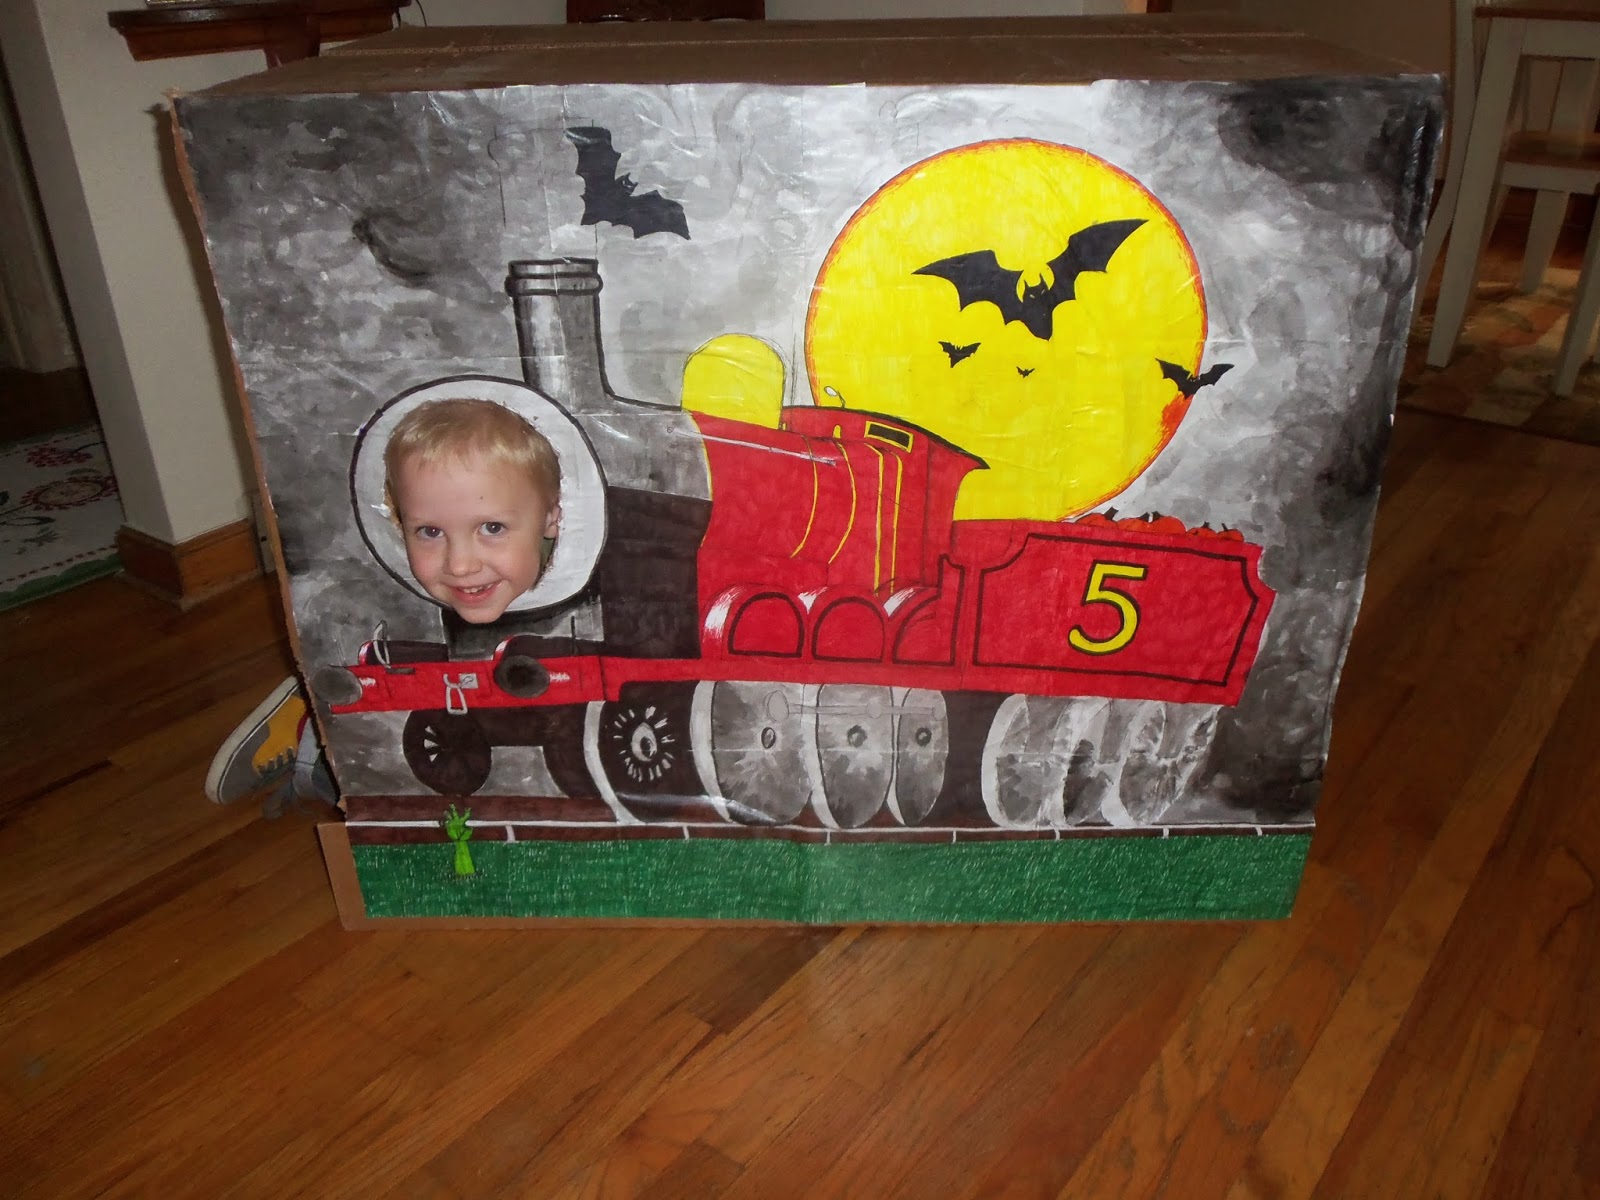
A friend on Facebook posted a picture of her son's construction worker birthday party. Her mom had decorated these cardboard cut-outs for kids to take pictures in. I thought what a great idea it is to make your own. I didn't want to go through the work and expense of buying wood, cutting it, and painting it, so I decided to go the cheap route. I colored images on pieces of computer paper and used Mod Podge to glue them to a large cardboard box Andrew brought home.

Here was the drawing in progress. I wanted to incorporate a Thomas & Friends train with a Halloween background. I chose James, which Andrew thought was weird, but I told him Thomas is going to be in a lot of the party decor, so I want to change it up a bit.


Oliver loved watching me draw and color, so he started working on his own train pulling a load of pumpkins, too.

A little Mod Podge to glue it onto the side of the large cardboard box:

And here's the final product:


I'm going to see if I have the time (and another box) to make an Emily cutout, too, that way all the decor isn't all boys. The party is for Jo, too, after all!

Here are the kiddos playing in the box:


Tuesday, November 5, 2013

Crafting with the Kids: Leaf & Wax Paper Lanterns

The kids and I decided to try out a fun project recommended in my MOMS Club newsletter this month. We made lanterns using leaves and wax paper!


The best part of the project was collecting leaves. We went out front and filled our jack-o-lantern bucket! Both kids really had fun doing this step, and we ended up with a whole lot of leaves.


Once we were finished collecting our leaves, we went inside. Oliver helped me sort through them, and we chose the best ones. I set up an ironing board and an iron (careful with little ones around!). Next, I laid out a sheet of wax paper. I couldn't figure out which side was waxed and which side wasn't. I tried to scratch each side, but I was stumped. Perhaps both sides of my wax paper were coated because that's what it seemed like to me! Anyway, the leaves I had were pretty big, so rather than folding the paper down in half, I just used two sheets and sandwiched the leaves inside. I set a dish towel on top and ironed the whole thing for a few minutes.


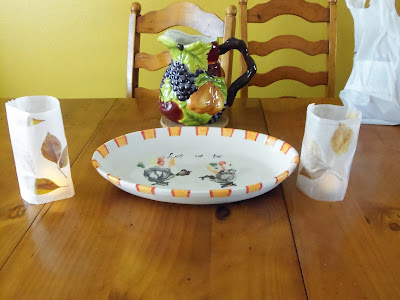
After that, I used some double-sided tape to stick the sides together, creating a tube. The kids placed some flameless LED candles inside, and--voila!--we had our lanterns.


Bonus video of the kids:
                                                         

Sunday, November 3, 2013

Painted Pottery: A Hand Print Keepsake for Thanksgiving


Last year, I found such a cute idea on Pinterest. I copied it exactly because it was too cute a perfect! I made this Halloween plate using Jo's footprints. Well, I got the idea to do something similar using the kids' hand prints. I meant to make a plate last year for Thanksgiving but lost track of time. I finally got around to making it now. So, here it is, my new, Thanksgiving turkey hand print plate! The print on the left is Oliver's, and the print on the right is Jo's. Those paint-your-own-pottery places are so fun.

Thursday, October 31, 2013

Trick or Treat 2013!


Weeks ago, Oliver told me he wanted to be a washing machine for Halloween. I love a challenge! Joanna was nominated to be the dryer.

I knew I'd make the costumes out of boxes, but I went online for more ideas. There were a few photos of people dressed as washers & dryers, but no info on how to make them. From the photos, I took away the idea of covering the kids in clothes. In the end, I needed two boxes, a roll of wrapping paper (any kind, as long as the back is plain white), tape, modelling clay, a Sharpie, some plastic pie or round cake covers, glue, blue food coloring, miscellaneous small boxes/bottles, dryer sheets, ribbon, and clothes.


Andrew brought home two boxes from work. They were Starbucks boxes from the coffee they provide in the break room. They were the perfect size for our kids. The smaller the person, the smaller the box! I pulled open one flap on top to serve as the panel for the appliances. I completely cut off the bottom of the box, and then I cut a hole out of the top of each. I took random leftover wrapping paper and wrapped the appliances inside-out. Double-sided tape helped keep things looking nice.

I couldn't find any extra knobs at hardware stores and craft stores, so I finally made my own out of modelling clay. It took about 5 minutes to make the knobs at 15 minutes to bake them, so it really wasn't that hard nor time consuming. I used a Sharpie to write in details for the dials, like "hot, warm, cold." Other than the modelling clay and ribbon, the only thing I had to go out and buy were the plastic pie covers. The kind I got had a plastic bottom and top that locked together. I stuck clothes in one and hot-glued it to the front of the "dryer." For the washer, I mixed Elmer's glue and a drop of blue food coloring. I poured it into one of the pie covers about halfway up. I poured some glue on top of that to look like foam, but it dried mostly clear.

I purchased ribbon from the discount section of Michael's. I got some for $1! I poked 4 holes in the top of each costume around the opening, kind of like the corners of a square. I took the end of a ribbon and poked it through the top of one hole and knotted it a couple of times on the bottom. I strung the ribbon across diagonally to another corner hole, cut the ribbon to size (Oliver had to stand in his so I could measure it to fit), and then I stuck it in the hole and knotted it. I repeated it again the other way, so each costume had two pieces of ribbon that formed an X. Their body went into the front of the X, and each arm went through a side of the X.

If the costumes had been for adults, I could have gotten away with using a regular dryer-sheet box. Our costumes were small, so one wouldn't fit. I dug around for a random box that I could use (I ended up using a Tobasco box cut down to size). I printed out a Bounce logo on printer paper and wrapped it around the box. I stuck a dryer sheet coming out of it. Oliver had a random bottle for some toy, and I put a Tide logo on it. I hot-glued the items to the washer & dryer and called it good!


The weather forecast was cold, so the kids needed hats. I decided to loosely sew on some undies and socks to their hats. I also sewed a dryer sheet onto Jo's hat. It looked so funny and cute! I decided that Oliver needed something extra on his hat, too, so I sewed on some cotton balls to look like soap bubbles. My mom tinted some blue (using just a little blue food dye in a ziploc bag).

Here are the kids in their finished costumes, ready to trick-or-treat!


I thought Jo would hate wearing her costume, but she loved it! She toddled off from house to house, gathering candy. She probably walked a full quarter mile by herself!


They are so funny.

Oliver had the time of his life. He loved his costume, and he also loved everything about trick-or-treating. He enjoyed ringing the doorbells and saying trick-or-treat and, of course, getting candy. He couldn't stop smiling!


The best part is that Oliver could use them as toys when we got home! I cut the ribbon off and let him go to town.

Tuesday, October 15, 2013

Preschool Kids' Craft: Easy Fall Wreath


Twice recently, I've taken Jo to MOMS Club, and she's gotten to play with foam stickers. She has had the best time with them! Just yesterday, we were at a mom's house, and Jo stuck a bunch onto a paper plate. It gave me an idea...

I went out to Michael's and found a bucket of those stickers. They were $7.99 but on sale for 40% off for Columbus Day. They usually have 40% off coupons on their website. I also picked up a glue stick and some paper plates from the grocery store. Then, I took & printed some photos of the kids. I cut them down to the size of the center of our paper plates.

Here are our supplies:
Jo quickly jumped into the project and stuck leaves all over the center--not exactly a wreath. I wanted her to have fun, though, so I lightly glued some parchment paper on the center of the plates. I figured I could just peel off the parchment paper at the end to get any excess stickers off the center. Turns out, that step ended up being unnecessary for Oliver. He was very eager to do the project "right" and stuck all the stickers around the edge of his plate.


He really loved this project!

Here's Oliver with his finished wreath. He even glued the back of the picture himself using a glue stick.


Joanna discovered it was better to put the stickers on herself and the table. She decided putting stickers on the plate just wasn't cutting it anymore.


It looks like she's putting more stickers on the plate. Nope! She's pulling them off.

So, Oliver got busy making an extra wreath frame for Jo!

I stuck magnets on the back and wrote their names and ages on the front. Everything else was done by Oliver! Afterwards, he begged to make more, so we are about to get busy making one more. This was so cute and simple, and it's a huge hit! I have tons of stickers leftover, though, including some turkey stickers, so we're going to have to figure out what to do with all of them.

Friday, April 5, 2013

Birdseed Biscuits


Spring has sprung in Denver, and we need some activities to get us out of the house!

At the grocery store today, I passed by a display of bird seed. Years ago, when I was pregnant with Oliver, I flipped through a Parenting magazine at my OB-GYN's office. I saw an article on how to make a cute, little, heart-shaped birdseed biscuit. I tore it out and saved it in my recipe box. When I started on Pinterest over a year ago, I went through a bunch of things I'd saved, pinned them, and then tossed out the random articles and how-to's that I'd saved. Let Pinterest save them for me! So, anyway, I found the birdseed biscuit online and pinned it here. When I saw the birdseed at the grocery store, it reminded me of the project. I decided Oliver is finally old enough! I picked up a 7-pound, reclosable bag of wild bird feed for $6. Warning to parents of kids with severe allergies: the bag of bird feed I picked up said it contains peanuts.


When we got home, I asked Oliver if he wanted to help me make some food for the birds. You guys, he got so excited!

Here's what you need to make your own bird seed biscuits:

*Bird seed (approximately 1 cup)
*Flour (approximately 2 Tablespoons)
*Water (as needed, but approximately 2-4 Tablespoons)
*Cookie Cutter (Or use a cup to cut out circles)
*A straw
*Ribbon or string

Here's how we made our biscuits:

I handed Oliver a 1/4 cup measuring cup and asked him to pour 5 scoops of the bird feed into a bowl. Not all of his scoops were full scoops, so we probably ended up with about a cup of bird seed in the mixing bowl. I asked him to add one small scoop of flour. He filled up the same measuring cup about halfway with flour and dumped it in, so we had about 2 Tablespoons of flour to our mix. This isn't an exact science, so go with it! I filled a small pitcher with just a splash of water. Oliver poured it in and mixed everything together. It looked a little dry, so I got a bit more water. The water and flour basically make a paste to hold the birdseed together.


While he mixed, I preheated the oven to 170 degrees F. I sprayed my cookie cutter with Pam. I lined a baking sheet with a silicone liner I have, but you can just put foil or parchment paper on your baking sheet. When Oliver was done mixing, I pressed the mixture into the cookie cutter. I poked a hole with a straw-like instrument I had on hand. Make sure the hole goes all the way through to the bottom of the biscuit, so you can string a ribbon through when they're done baking. The directions I read said to leave the straw in while it bakes, but I actually pulled mine out. It wasn't a problem for us. I gently lifted the cookie cutter away from the biscuit and then got to work on the rest. We got 6 small biscuits out of our mixture. I popped the biscuits in the oven for an hour for them to dry and set.
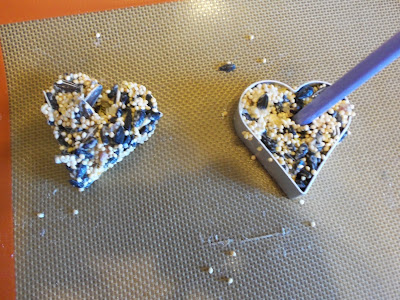


As they were baking, I put Jo to bed for nap time. As I tucked Oliver in for his quiet time, he looked up at me and said, "OK, so after quiet time, we can go outside and give the birds the food." He is so excited! That made me really happy. The biscuits finished up as they rested, so I finished the project by threading ribbon through the hole in each biscuit, and I tied it with a bow.

As soon as Jo was up, Oliver announced, "OK! We get to go outside and give the birds their food!" He hung each biscuit from the tree. Then, we sat on the porch and blew bubbles, watching for the birds to come.


The birds didn't come. When we ran out of bubbles, I told Oliver we were probably scaring the birds away. So, we went inside, and he watched from the back door.


Finally, a little critter came and ate two of the biscuits. No, it wasn't a bird. It was a squirrel! I captured this photo of the guilty party: